
A menswear AI prompts pack is only as useful as the ten minutes you spend learning how to actually use it. Most people download one, paste the first prompt into Midjourney or ChatGPT, get a slightly-off result, and give up. That’s not a prompt problem—it’s a workflow problem. The prompts do the heavy lifting, but a handful of small habits separate a pack that sits unused in a downloads folder from one that becomes your go-to tool for every shoot concept, lookbook, or social post.
This guide walks through nine practical hacks for getting real, usable results out of a menswear AI prompts pack — the kind of results you’d actually post, not just the kind you’d delete and try again. None of this requires design experience or a background in photography. It just requires knowing what each part of a prompt is doing and why.
If you’ve ever generated a fashion image that came out looking blurry around the hands, oddly lit, or just “off” in a way you couldn’t quite explain, you’ve already run into the exact problems these nine hacks are built to solve. None of them are complicated. Most of them take less time to apply than it took you to read this paragraph. But together, they’re the difference between a prompts pack that sits half-used in a downloads folder and one you actually reach for every time you need a new piece of content.
This guide is built around one goal: helping you get more out of your menswear AI prompts pack than the first prompt you try.
What Is a Menswear AI Prompts Pack, Really?
At its simplest, a menswear AI prompts pack is a collection of pre-written text prompts built specifically for generating men’s fashion imagery — formal wear, streetwear, ethnic looks, or everyday lifestyle shots — using tools like Midjourney, ChatGPT, Adobe Firefly, or Stable Diffusion. Instead of writing a prompt from scratch every time (and guessing at what makes an image look editorial instead of generic), you start from something that’s already been tested.
The value isn’t just in the writing. A good pack encodes decisions you’d otherwise have to make yourself: what lighting setup reads as “premium,” what camera language pushes an image toward realism, how to phrase a pose so it doesn’t look stiff. That’s the part most people skip past, and it’s the part that actually matters.
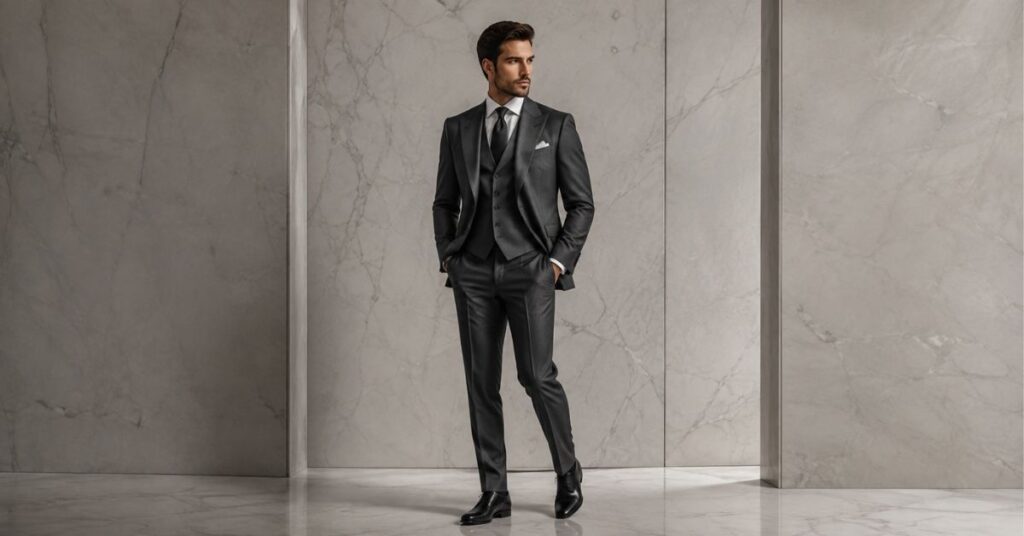
Think about the difference between typing “a man in a suit” into an AI tool versus a full prompt that specifies a charcoal three-piece suit, a marble backdrop, soft directional studio light, and an 85mm lens with a shallow depth of field. Both technically describe “a man in a suit.” Only one of them is going to come back looking like it belongs in a fashion campaign. A menswear AI prompts pack exists to close that gap without you having to learn photography terminology from scratch — but only if you understand what each phrase inside the prompt is actually doing, which is exactly what the rest of this guide covers.
It’s also worth saying plainly what a prompts pack is not. It’s not a magic button that guarantees a perfect image on the first try — AI image generation still involves some trial and error, no matter how good the prompt is. And it’s not a replacement for having a rough idea of what you want before you start; the prompts give you a strong starting point, but the nine hacks below are what turn that starting point into a finished, usable image.
That distinction is what separates a genuinely useful menswear AI prompts pack from a random list of text prompts copied off the internet.
Hack 1: Start With a Structure, Not a Sentence
The biggest mistake people make with any menswear AI prompts pack is treating each prompt as one long sentence to memorize, instead of a structure to understand. Every well-built prompt in a pack like this is made of the same five pieces, in the same order:
- Subject — who’s in the frame
- Clothing — the specific garment and details
- Setting — where the shot takes place
- Lighting and camera – what makes it look shot, not generated
- Mood and format — the tone, plus the aspect ratio
Once you see a prompt as five slots instead of one block of text, everything else in this guide gets easier. You stop being afraid to edit it.
How to Apply It
Take any prompt from your pack and mentally split it into those five parts before you use it. If a result comes back looking flat or generic, ask which slot is weak — usually it’s the lighting and camera section, not the clothing description. Once you can spot which slot is underperforming, you can fix a single phrase instead of rewriting the whole prompt.
Here’s a concrete example. Take this prompt structure:
“[Subject] in [clothing], standing in [setting], [lighting/camera], [mood], [aspect ratio]”
If you swap out only the setting — say, from a hotel lobby to a rooftop at dusk — you’re testing one variable. If the resulting image still feels off, you know it’s not the setting that’s the problem, because you didn’t touch it. That kind of isolated testing is only possible once you can see the five slots clearly instead of reading the prompt as one continuous block of text. It sounds like a small mental shift, but it’s the one that makes every other hack in this guide actually usable.
This structure is the backbone of every prompt in a well-built menswear AI prompts pack, even when the wording changes completely between categories.
Hack 2: Lock In the Lighting Before You Touch the Outfit
Here’s something that surprises most first-time users: the outfit description matters less than people think. Lighting and camera details are what separate an editorial-looking image from something that screams “AI-generated”. A prompt that says “soft directional studio light, 85mm f/2 lens, shallow depth of field” is doing more work than three extra adjectives about the jacket.
This is also the part people cut first when they’re trying to “simplify” a prompt — and it’s exactly the wrong instinct. Simplifying the lighting line is what makes results look worse, not better.
How to Apply It
Before changing anything else in a prompt, keep the lighting and camera phrase completely intact on your first attempt. Generate the image once with it exactly as written. Only after you’ve seen that baseline result should you start adjusting other parts of the prompt — that way you know exactly what the lighting language is contributing.
A useful trick if you’re not sure whether a lighting phrase is “working”: generate the same prompt twice, once with the full lighting/camera phrase and once with it stripped down to something generic like “good lighting”. Compare the two side by side. Most people are surprised at how much of the “editorial” feel disappears the moment specific terms like “85mm f/2 lens”, “shallow depth of field”, or “soft directional studio light” get removed. Once you’ve seen that comparison for yourself, you’ll stop wanting to shorten that part of the prompt.
This is the single most important lesson buried inside any menswear AI prompts pack — the lighting phrase is doing more work than people assume.
Hack 3: Treat the Subject Placeholder Like a Variable
This is the step most people rush past when they first open a menswear AI prompts pack — and it’s the one that causes the most confusion.
Every prompt in a menswear AI prompts pack uses a placeholder — usually written as {SUBJECT} — instead of describing a specific person. This is intentional, and it’s also where most people get stuck, because they don’t know what to type instead.
There are really only two situations, and each has a different fix:
You’re using a reference photo (a face-swap or image-to-image tool): replace the placeholder with something like “the uploaded photo” or “the reference image, face-matched”. Some tools want you to attach the image separately and just reference it in text; others want a fuller description alongside the upload.
You’re generating a brand-new model with no reference: replace the placeholder with a short, neutral description — “A confident man in his late 20s with short dark hair” is usually enough. Over-describing the person here tends to fight with the clothing description later in the prompt.
How to Apply It
Write your subject replacement as a separate short phrase before you touch anything else in the prompt, then paste it into the placeholder. Keep it under 10–12 words. If your results start looking like the wrong age, build, or styling, that’s almost always the subject phrase being either too vague or too specific — not the rest of the prompt.
A common failure mode here is writing a subject description that fights with the clothing description later in the prompt. If your subject phrase says “a tall, athletic man in his early 20s” and the clothing phrase describes a look aimed at a much older, more formal aesthetic, the AI tool has to reconcile two slightly conflicting signals – and the result often looks like a compromise between them rather than a clean, confident image. Keep the subject phrase neutral on details the clothing prompt already implies (formality, setting, and mood), and only specify what the clothing prompt doesn’t cover — age range, build, hair.
Hack 4: Change One Thing at a Time
Every menswear AI prompts pack rewards patience here — testing one variable at a time is slower at first, but it’s what makes the results repeatable.
This is the single habit that separates people who get a consistent series of images from people who get ten unrelated ones. If you change the fabric, the pose, and the setting all in the same prompt edit, you won’t know which change caused the shift in output — and you won’t be able to repeat it on purpose.
How to Apply It
Pick one prompt from your pack as a base. Generate it once. Then change only the setting (say, from a marble courtyard to a rooftop at dusk) and generate again, keeping everything else — the subject, clothing, and lighting — untouched. Compare the two. This is how you build an actual understanding of what each part of the prompt is doing, instead of guessing.
If you’re building a series for a single project — say, five images of the same “model” in different settings — this single-variable approach is the only way to keep them looking like they belong together.
It also helps to keep a simple running log while you work, even if it’s just a plain text note: prompt used, what you changed, and a one-line note on the result. It feels slow the first time you do it, but after generating a dozen images without notes, most people can’t remember which small wording tweak produced which result and end up re-testing changes they already tried an hour earlier.
Hack 5: Match the Aspect Ratio to Where the Image Is Going
Aspect ratio is one detail people overlook in a menswear AI prompts pack, even though it’s one of the easiest to get right.
Most prompts in a well-built menswear AI prompts pack default to a 4:5 ratio because that’s what works best across Instagram posts, Pinterest pins, and most portrait-style social formats. But that’s a default, not a rule.
If you’re generating something for a website banner, you probably want a wider ratio. If it’s a story or reel cover, vertical 9:16 is going to serve you better than 4:5. Tools like Midjourney let you control this with a flag (–ar 16:9, for example); others have a dropdown or settings panel.
How to Apply It
Before you generate, decide where the image is actually going to live — Instagram grid, website hero image, Pinterest pin, print — and adjust the ratio flag accordingly. Don’t generate in the default ratio and crop afterward if you can avoid it; cropping after generation often cuts off exactly the compositional details (hands, background elements, framing) that made the lighting and camera phrasing work in the first place.
It’s worth keeping a short mental map of which ratio serves which platform, since it comes up constantly once you’re generating content regularly: 4:5 for Instagram feed posts and most portrait social formats, 1:1 for a classic square grid layout, 9:16 for Stories, Reels covers, and most short-form vertical video thumbnails, and 16:9 or wider for website banners and horizontal display ads. None of these are hard rules — platforms update their preferred dimensions occasionally — but they’re a solid starting point that saves you from generating an image and then discovering it doesn’t actually fit where you meant to put it.
Getting the aspect ratio right is a small detail, but it’s one of the easiest wins a menswear AI prompts pack gives you if you actually use it.
Hack 6: Build a Lookbook, Not a Single Shot
A single AI-generated image is a nice test. A set of four or five images of the same subject across different categories — one formal shot, one streetwear shot, one ethnic look, one lifestyle scene — is what actually reads as a lookbook, and it’s a much stronger piece of content whether you’re posting it, pitching it, or using it as a portfolio sample.
How to Apply It
Pick one subject description and keep it word-for-word identical across four prompts pulled from different categories in your pack. Generate all four in the same session so lighting style and overall tone stay reasonably consistent. Lay them out together – even a simple 2×2 grid – before you post. This is where a menswear AI prompts pack earns its price: not from one good image but from a full set that looks like a coordinated shoot.
This is also where the earlier hacks compound. A lookbook built from four prompts that each skip the lighting phrase (Hack 2), use a different subject description each time (Hack 3), and mismatch category settings (Hack 7) will look like four unrelated stock photos stitched together. A lookbook built with the subject phrase held constant, lighting phrases left intact, and category-appropriate settings will look like a single shoot with four outfit changes – which is the entire point of putting a set together in the first place.
Hack 7: Use Category-Specific Language for Each Style
A menswear AI prompts pack organized into categories only helps if you keep each category’s language separate—mixing them is where most inconsistent results come from.
Formal wear, streetwear, ethnic menswear, and smart-casual lifestyle shots don’t just need different clothing descriptions — they need different lighting and setting language too, because each style reads as “authentic” in a different visual context.
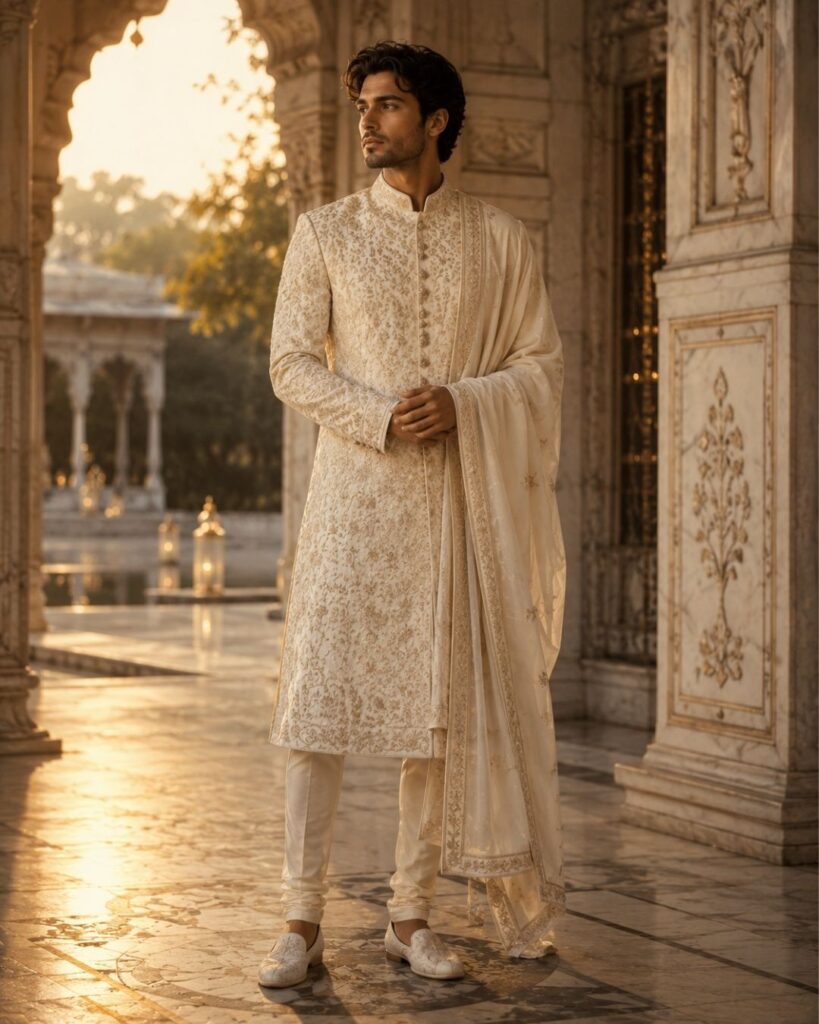
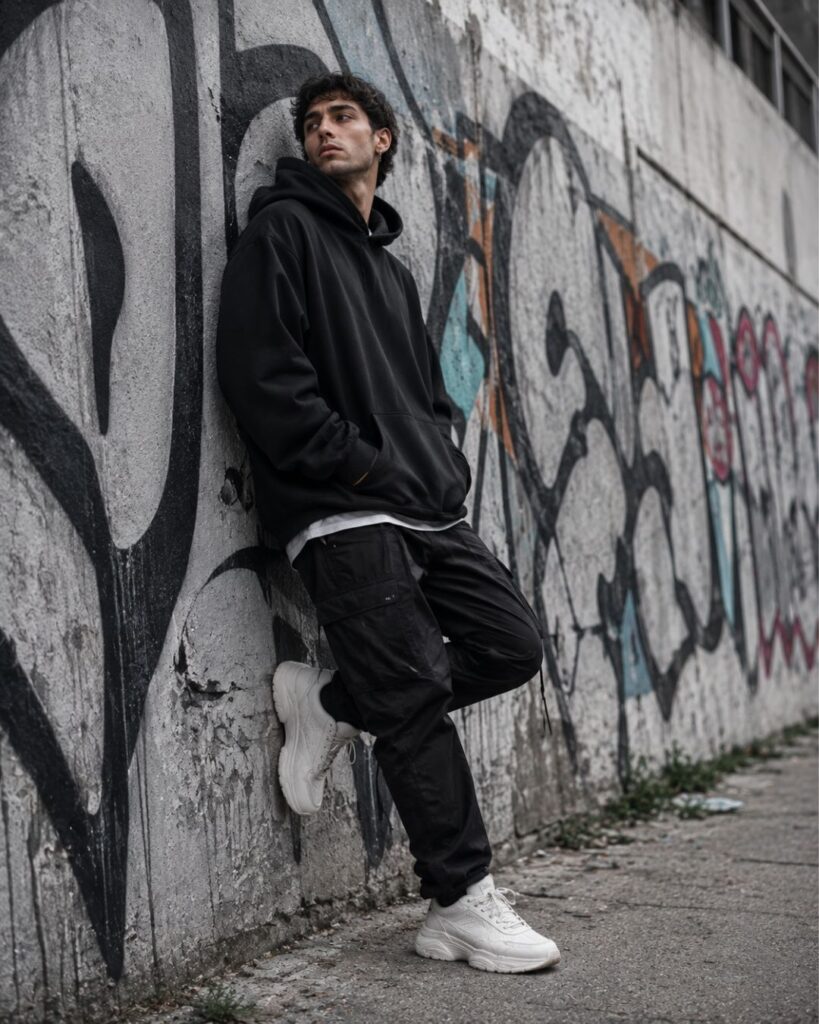
Formal wear tends to work best with clean studio light or golden-hour backlight against architectural settings — marble, glass, and stone. Streetwear reads more convincingly with harder daylight, urban textures like graffiti or concrete, and a bit of motion. Ethnic looks lean into warm, ambient light — string lights, brass lamps, golden-hour courtyards — because that’s the lighting context these garments are usually photographed in. Smart-casual lifestyle shots do best with soft, natural daylight and everyday settings: cafes, bicycles, gardens, kitchens.
How to Apply It
If a formal-wear prompt isn’t landing, check whether you’ve swapped in a streetwear-style setting by accident (a lot of people copy a setting phrase from one prompt into another without noticing the mismatch). Keep the setting and lighting language paired with its original category unless you’re deliberately experimenting with a fusion look.
A simple way to internalise this: read the setting and lighting phrase from a prompt out loud, without the clothing description, and ask yourself which category it sounds like it belongs to. If a phrase like “harsh urban daylight, gritty street-style photography” doesn’t sound like it belongs with a three-piece suit, that’s your answer — the mismatch will show up in the generated image even if you can’t immediately articulate why it looks wrong.
Hack 8: Know Which AI Tool Fits Which Prompt
Not every tool interprets a prompt the same way, and a menswear AI prompts pack that’s genuinely useful should work across most of them — but “works” doesn’t mean “identical results.”
Midjourney tends to produce the most consistently editorial, photography-style results straight out of the box, and it respects camera and lens language (like “85mm f/2 lens”) particularly well. ChatGPT’s image generation is faster to iterate with conversationally — you can ask it to adjust a specific detail without rewriting the whole prompt. Stable Diffusion and Leonardo AI give you more manual control (useful if you’re comfortable adjusting settings beyond the prompt text), while Adobe Firefly is a solid choice if you’re already working inside Adobe’s ecosystem and want the output to drop straight into a Photoshop or Illustrator file.
How to Apply It
If a prompt isn’t giving you the result you expected, try it in a second tool before assuming the prompt is the problem. Camera and lens phrasing especially can behave differently across models — what reads as “cinematic” in one tool might get partially ignored in another.
It also helps to think about your own workflow preferences, not just output quality. If you’re generating a handful of images occasionally, a conversational tool where you can ask for small adjustments in plain language is going to feel faster. If you’re producing a high volume of content on a regular schedule, a tool with more granular manual controls is usually worth the slightly steeper learning curve, because it gives you more precise control over consistency across a large batch.
No single tool is the “correct” one to pair with a menswear AI prompts pack — it comes down to which workflow fits how you like to work.
Hack 9: Fix the Three Mistakes That Ruin Menswear AI Photos
Most of the disappointing results people blame on a menswear AI prompts pack actually trace back to one of these three fixable habits.
Almost every disappointing result traces back to one of three habits:
Over-editing the prompt before testing the original. Changing five things at once means you can’t tell what broke the result.
Skipping the lighting and camera phrase to make the prompt “shorter.” This is the single most common cause of flat, generic-looking output — see Hack 2.
Mismatching category language, like pairing a formal-wear clothing description with a streetwear setting, which confuses the overall mood of the image — see Hack 7.
How to Apply It
Before troubleshooting a bad result, run through this three-point checklist: Did I keep the lighting/camera phrase intact? Did I only change one variable? Does the setting match the category? Nine times out of ten, the fix is smaller than it feels.
Real Prompt Examples You Can Copy and Customize
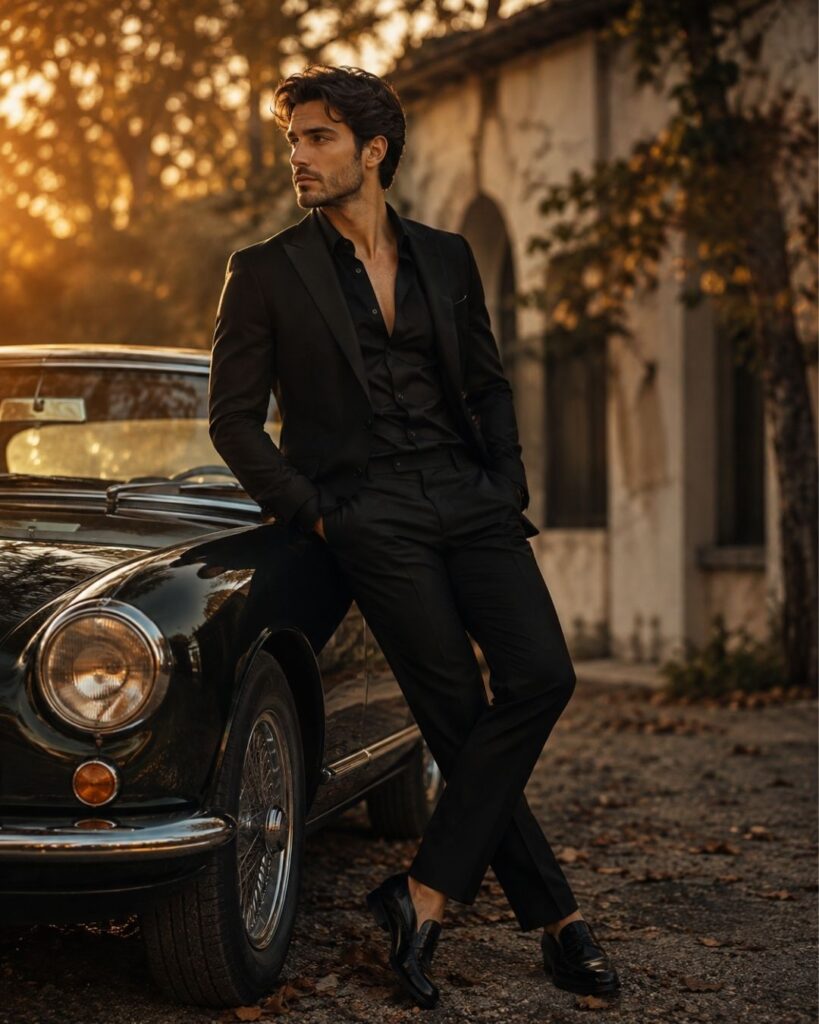
Every hack above solves a different piece of the same problem: getting a menswear AI prompts pack to produce results that actually look intentional.
Reading about prompt structure only goes so far — seeing four finished examples side by side, one from each style category, makes the five-slot structure from Hack 1 much easier to spot in the wild. Here’s one prompt from each category, with the structure still visible if you look for it.
Formal wear:
A full-body editorial portrait of the subject in a charcoal grey three-piece suit with a peak-lapel jacket, standing against a minimalist marble backdrop, soft directional studio light, 85mm f/2 lens, crisp confident stance, luxury menswear campaign aesthetic, 4:5
Streetwear:
The subject wearing an oversized black hoodie, cargo pants, and chunky white sneakers, leaning against a graffiti-covered wall, harsh urban daylight, gritty street-style photography, 4:5
Ethnic menswear:
The subject wearing a hand-embroidered cream sherwani with a matching dupatta draped over one shoulder, standing in a marble courtyard, warm golden-hour light, festive editorial elegance, 4:5
Smart casual & lifestyle:
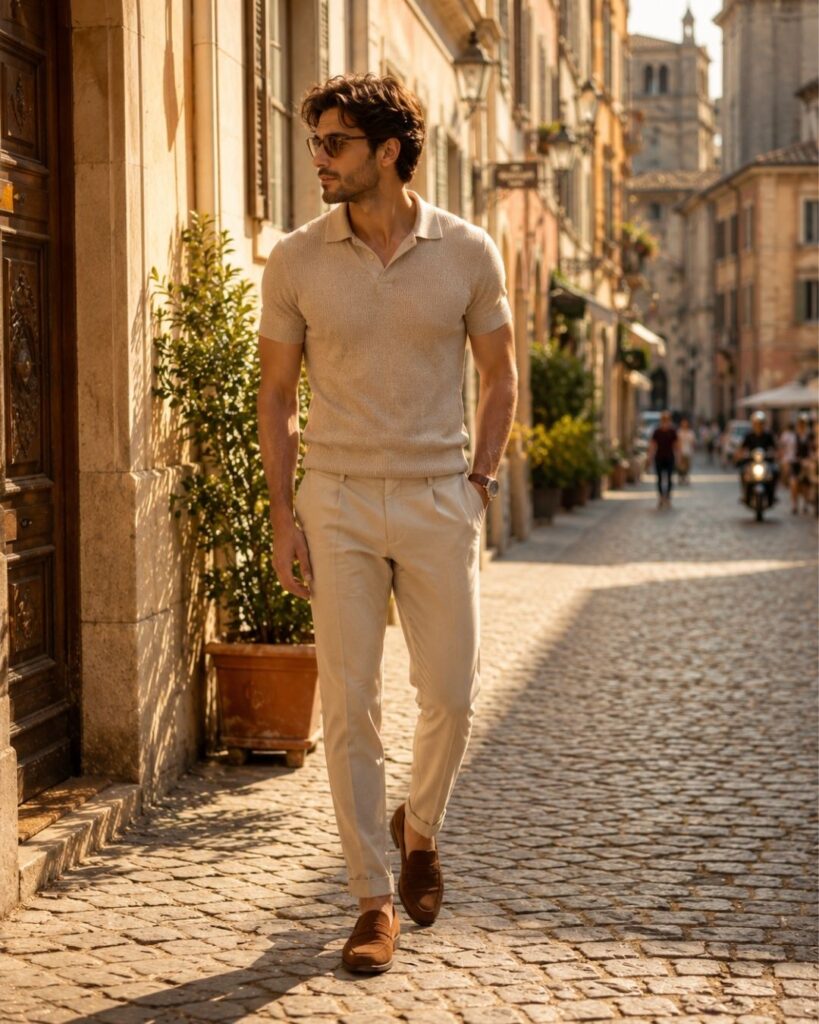
The subject in a fitted knit polo and chinos, walking through a sunlit European cobblestone street, warm travel-lifestyle tone, relaxed confident posture, 4:5
Notice that each one follows the same underlying order — subject, clothing, setting, lighting/camera, mood, format — even though the vocabulary shifts completely between categories. That consistency is what makes it possible to swap one slot at a time (Hack 4) without breaking the rest of the prompt.
Quick Reference Cheat Sheet
If you only remember one thing from each hack, this is the condensed version:
- decoration—keepStructure first. Five slots: subject, clothing, setting, lighting/camera, mood + format.
- Lighting isn’t optional. It’s usually doing more work than the outfit description.
- The subject placeholder is a variable, not decoration — keep it short and neutral.
- Change one thing per test. Otherwise you can’t tell what caused the shift.
- Match the aspect ratio to the platform before you generate, not after.
- Build sets, not singles, for anything you’re actually going to publish.
- Keep setting language paired with its category—don’t mix a streetwear backdrop into a formal-wear prompt.
- Try a second AI tool before assuming a prompt itself is broken.
- Run the three-point checklist — lighting intact, one variable changed, category matched — before troubleshooting anything else.
Keep this list nearby the first few times you sit down with your menswear AI prompts pack — it gets automatic fast.
Frequently Asked Questions
What is a menswear AI prompts pack used for?
A menswear AI prompts pack is used for exactly this—generating men’s fashion photography with AI tools, whether for content creators, small fashion brands, or anyone building a lookbook without a full photoshoot.
Do I need design or photography experience to use one?
No. The prompts already include the lighting, camera, and composition language that photographers usually have to learn — you’re customizing, not writing from scratch.
Which AI tools work with a menswear AI prompts pack?
Most well-written packs are compatible with Midjourney, ChatGPT, Adobe Firefly, FLUX, Stable Diffusion, and Leonardo AI, though results vary slightly by tool (see Hack 8).
How do I keep a series of images looking consistent?
Keep the subject description identical across prompts and change only one variable — setting, pose, or fabric — at a time (see Hack 4).
Can I use these prompts for a real fashion brand or client work?
Yes, most packs are sold for unlimited personal and commercial use once purchased, though it’s worth checking the specific pack’s terms before using the output commercially.
Why do my results look generic even when I use the exact prompt?
This almost always traces back to Hack 2 or Hack 9 — either the lighting and camera phrase got shortened somewhere along the way, or the AI tool itself is defaulting to a flatter interpretation. Try the same prompt in a second tool before assuming the prompt is at fault.
Can I combine prompts from two different categories in one image?
You can, and it’s a reasonable way to create fusion looks — just be aware that mixing category-specific setting and lighting language (Hack 7) can produce mixed signals. If you want a deliberate fusion style, keep the clothing description mixed but let the lighting and setting language stay consistent with one category.
Does a menswear AI prompts pack work for commercial content?
Most menswear AI prompts packs are built for exactly this — social content, lookbooks, and marketing visuals — but always confirm commercial usage terms with the specific pack you’re using.
How many images should I generate before I get one I actually want to use?
There’s no fixed number, but generating three to five variations of the same prompt — without changing the wording — is a reasonable baseline before you start editing the prompt itself. AI image generation has some built-in randomness, so the first result isn’t always representative of what the prompt can produce.
None of these nine hacks require you to become a prompt engineer or a photographer. They’re habits—small, repeatable checks you run before and after generating an image, built around understanding what a menswear AI prompts pack is actually structured to do. Once they become second nature, the gap between “an AI-generated image” and “an image that looks like it came from a real shoot” gets a lot smaller, and a lot more predictable.
If you want to go straight from reading this to generating your own set, our free menswear AI prompts guide is a good place to try a handful of prompts first and get a feel for the structure covered in Hack 1. When you’re ready for the full library—all 100 prompts across formal, streetwear, ethnic, and lifestyle categories, already built around every hack in this guide — the complete menswear AI prompts pack is available in the store.